Turn Product Ideas Into Campaigns
If you have products to promote, there are key steps in deciding which ones to highlight, how to present them, and how to pitch them to clients.
A good starting point is the customer program your products can support. A distributor may need recognition gifts. A decorator may be sourcing apparel for an employee uniform program. A team dealer may be planning fan merchandise. Your creative should help that buyer see where your products fit.
OneSource is the supplier growth platform within Taivo, connecting product data, buyer discovery, and advertising opportunities. The goal is straightforward: make your products easier to find and sell.
Use this toolkit to build your next campaign, from the first brief to the final artwork. The templates and examples are right here, ready to use.
Want a copy to share? Download the free Supplier Advertising Toolkit
1. Start With a Simple Campaign Brief
Before anyone opens a design file, agree on what the campaign needs to accomplish. A short brief gives marketing, sales, and product teams a shared starting point and helps your designer avoid unnecessary revisions.
Use these prompts to build your campaign brief:
Campaign Brief Template
Goal: What should this campaign accomplish?
Audience:Who needs to see it, and what are they trying to source or sell?
Product focus: Which product or small collection will you feature?
Main message: What is the most useful reason to consider it?
Supporting detail: Which verified product fact backs up that message?
Action and destination: What should buyers do, and where will the link take them?
Placement and timing: Where will the creative run, and when are assets due?
Success measure: Which available metric will help you evaluate the response?
Approver: Who confirms the copy, product details, and final artwork?
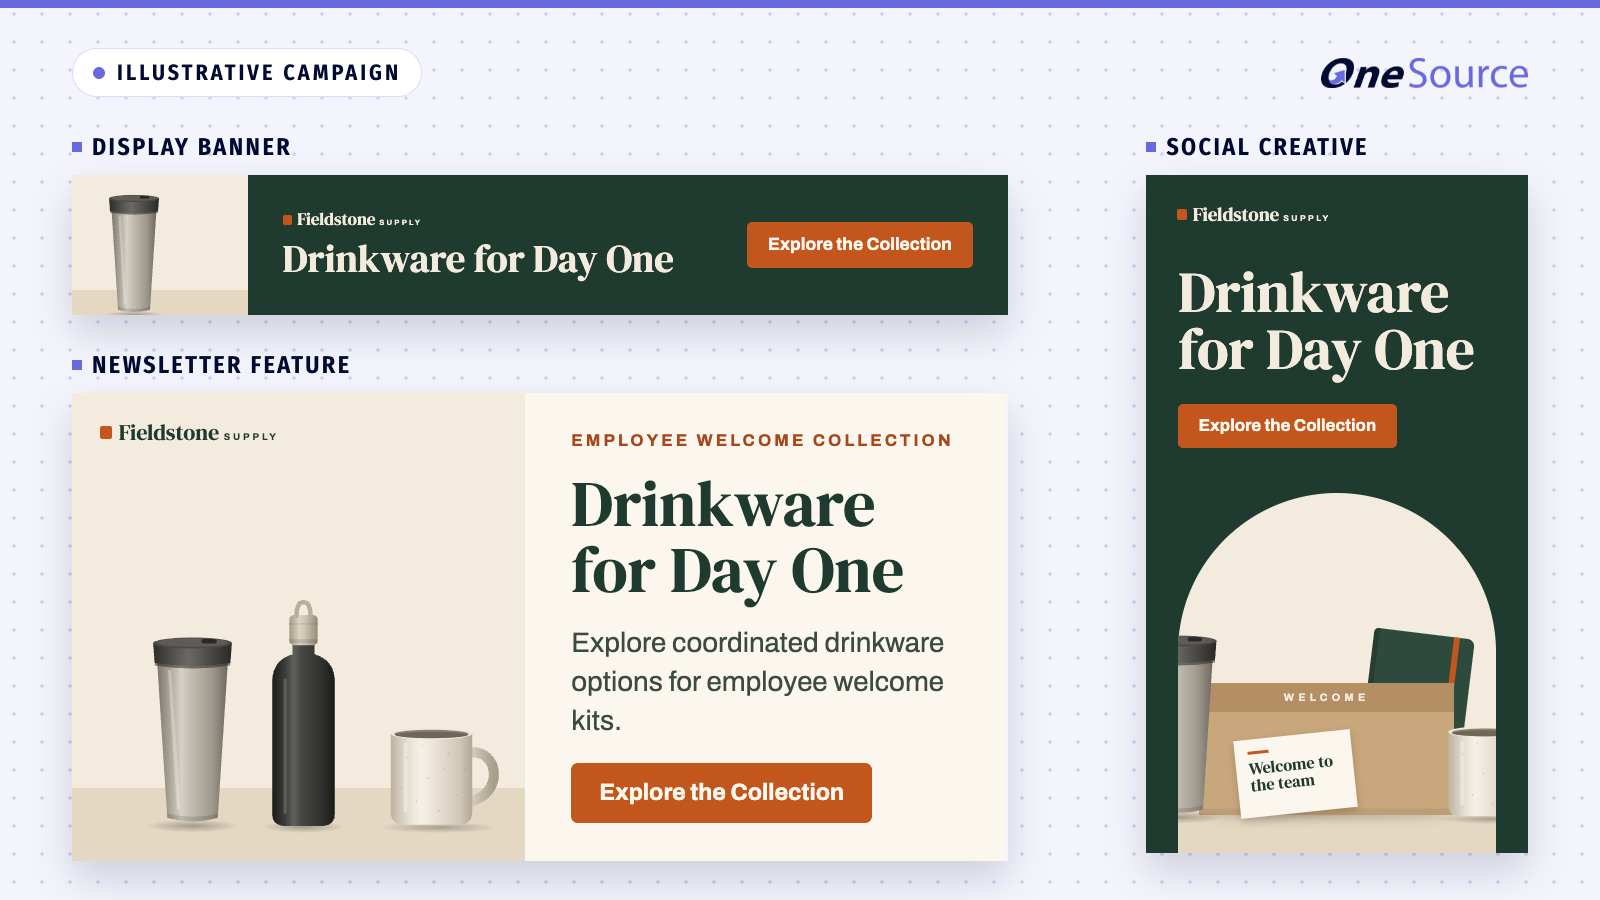
For example, a supplier promoting drinkware might choose this brief: reach distributors planning employee welcome kits, feature three coordinated drinkware styles, lead with the welcome-kit use case, and send buyers to that collection. The campaign goal is collection visits, with website engagement reviewed alongside available placement reporting.
That gives the team a clear assignment before design begins.
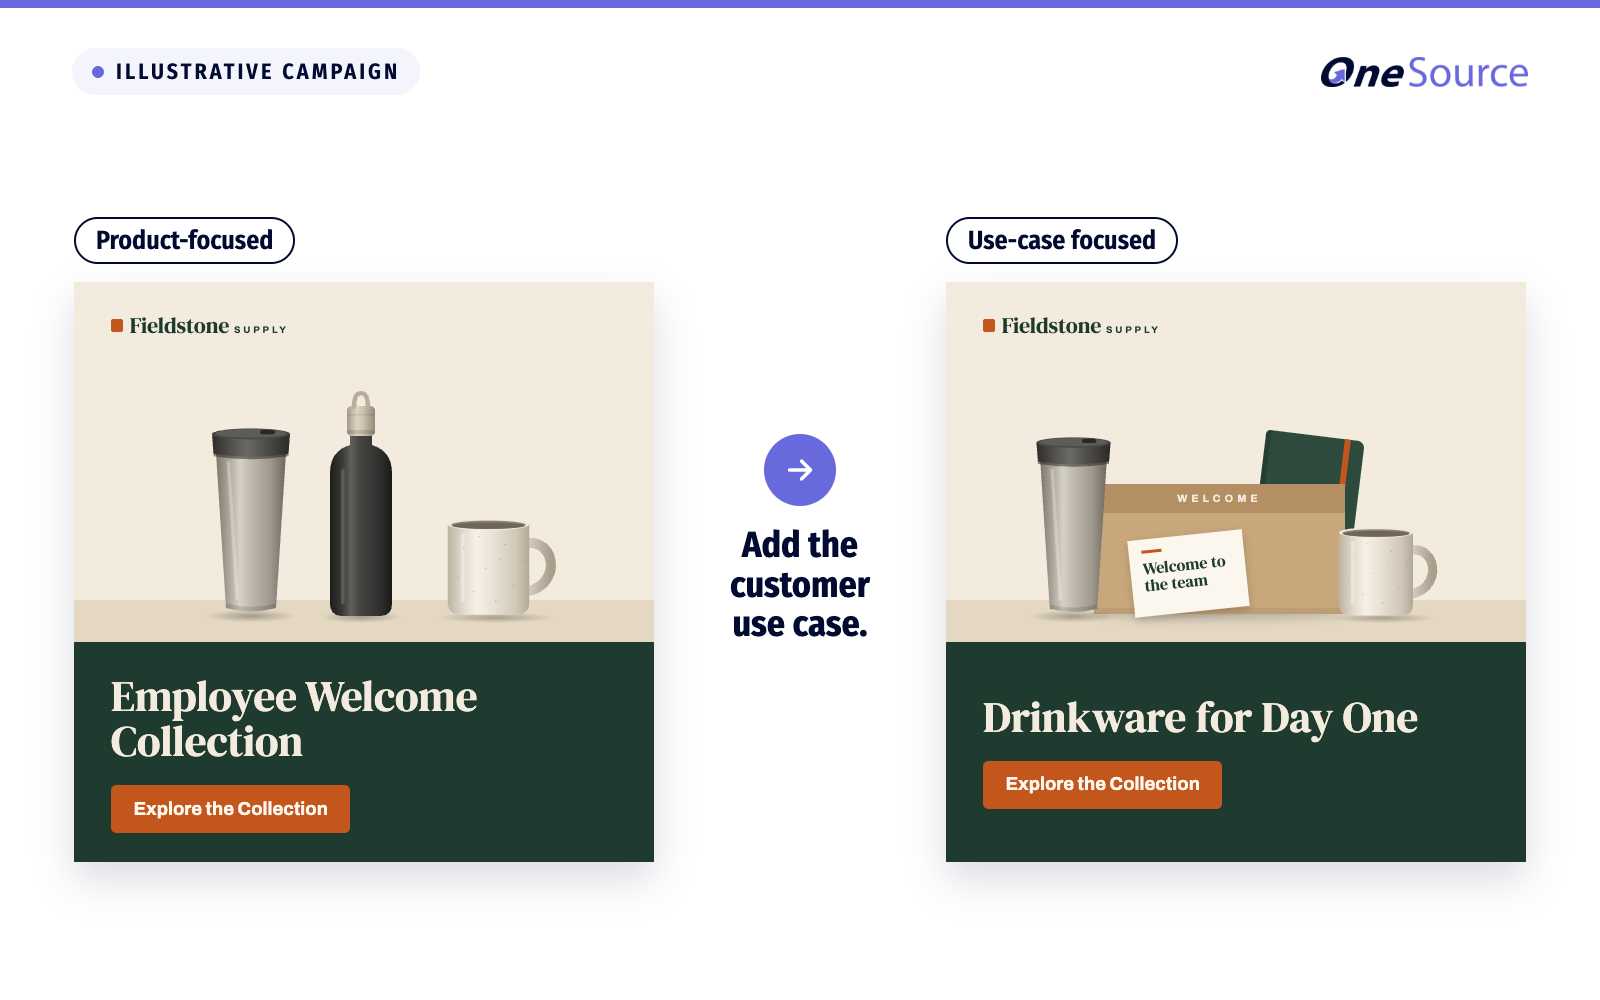
2. Give Buyers a Reason to Choose Your Products
Your product name identifies the item. Your campaign message helps buyers understand why it belongs in their next customer program.
Start with this copy formula:
Customer use case + relevant product benefit + clear next step.
Here are three examples you can adapt. Confirm every product claim before using it.
- Example A: Employee Welcome Kits
- Headline: Drinkware for Day One
- Supporting copy: Explore coordinated drinkware options for employee welcome kits.
- CTA: Explore the Collection
- Example B: Apparel for Decorators
- Headline: Meet Your Next Team Tee
- Supporting copy: Compare colors, sizes, and decoration details for your next team program.
- CTA: View Product Details
- Example C: Recognition Gifts
- Headline: Make Recognition More Personal
- Supporting copy: Browse personalized gifts for employee milestones.
- CTA: Browse Recognition Gifts
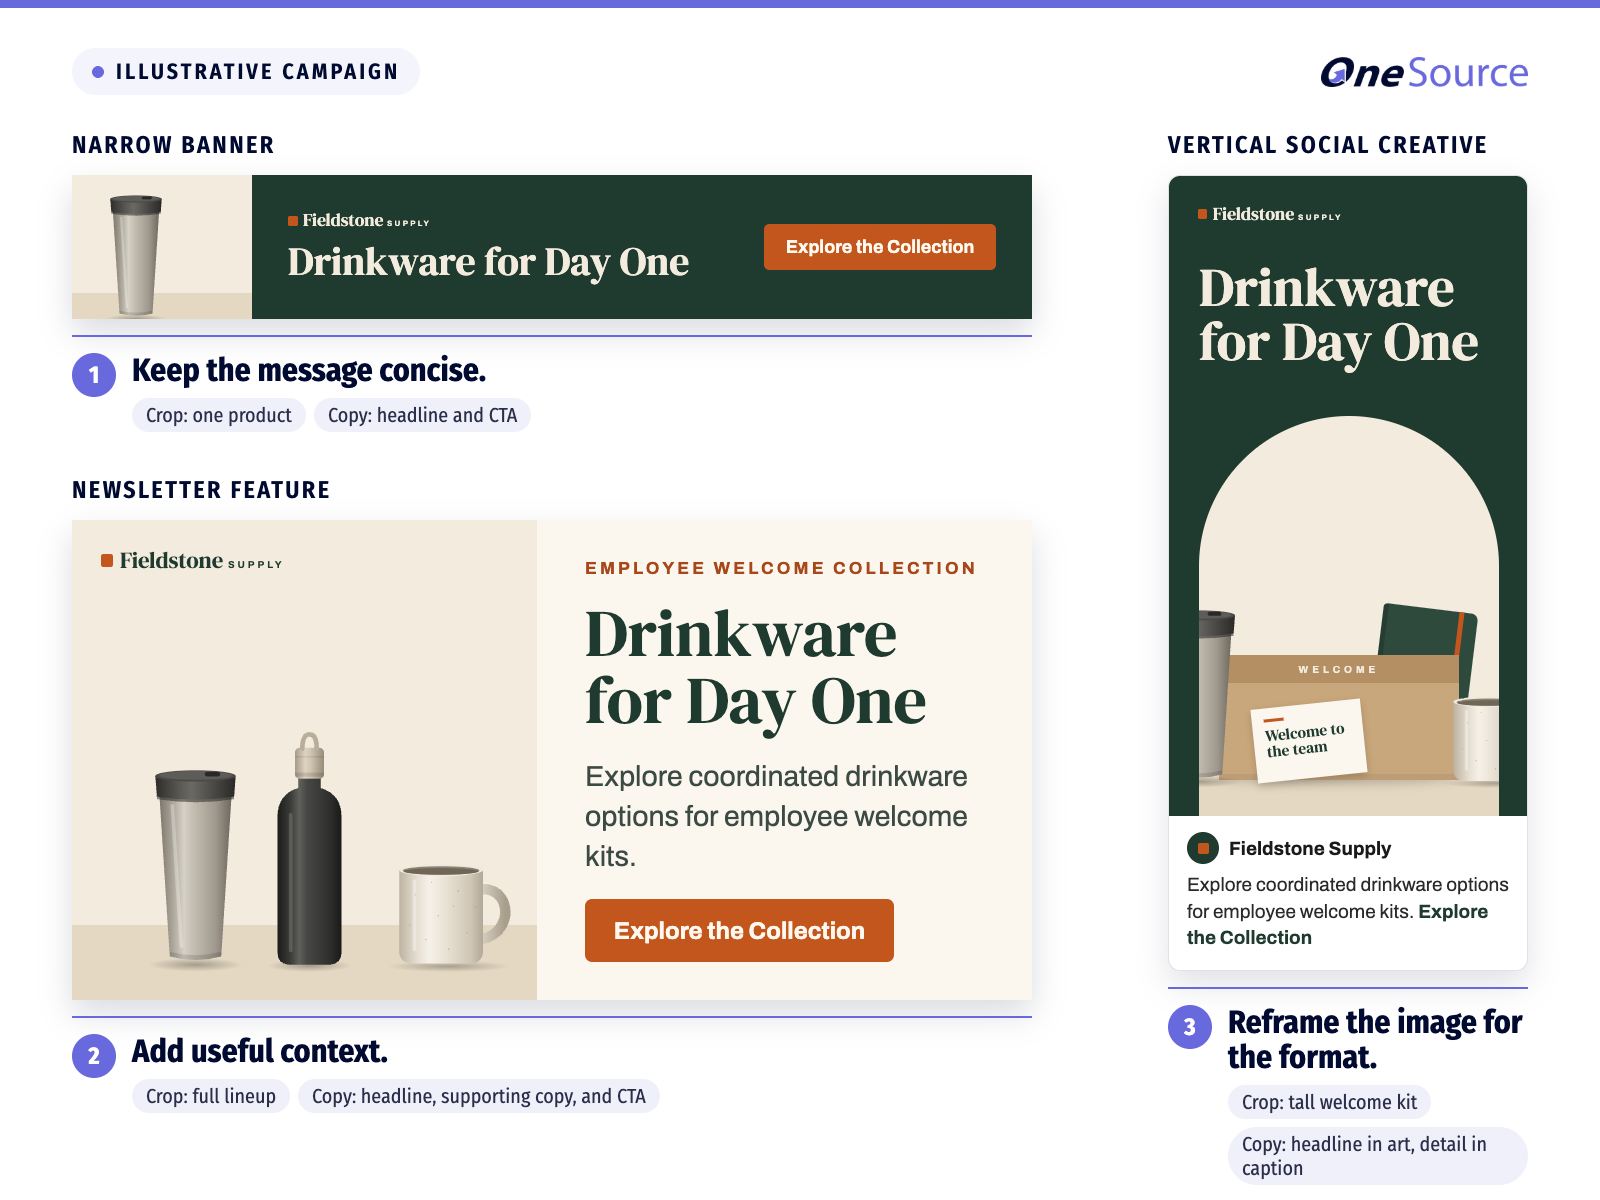
Use only the copy the placement has room for. A small banner may need the headline and CTA alone. A newsletter feature can give buyers more context.
If your message includes inventory, turnaround, sustainability, or decoration claims, ask the team responsible for those details to verify them. For deadline-sensitive campaigns, distinguish the ship date from the delivery date and explain any decoration requirements.
3. Build a Reusable Creative Kit
Keep the campaign materials together so your team can create additional placements without searching through old emails or rebuilding every asset.
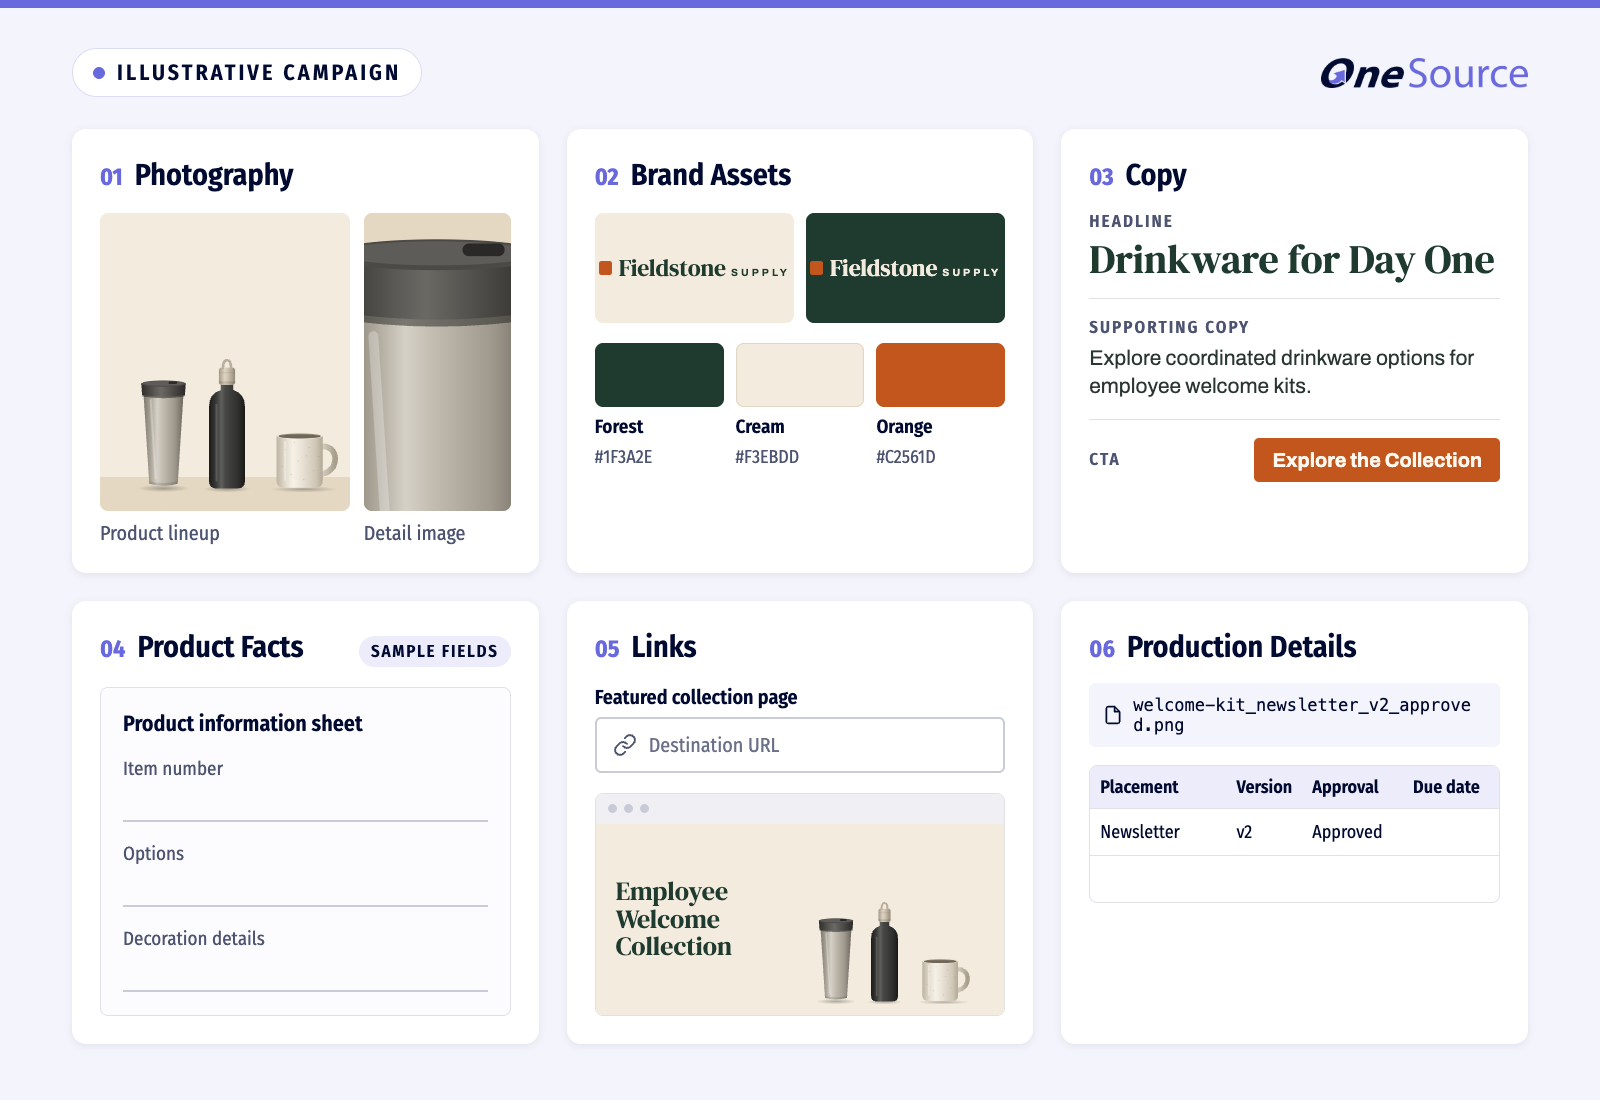
Your creative kit should include:
- Product photography: An original product image, a detail shot, and a relevant lifestyle image when available.
- Brand assets: Your approved logo files, colors, and fonts.
- Copy: The main headline, a shorter alternative, supporting copy, and CTA.
- Product facts: Item numbers, available options, decoration information, and approved claims.
- Links: The destination URL and any tracking links for your website.
- Production details: Placement specifications, due dates, and approval status.
Choose photography that the buyer can understand. A detail shot can show a zipper or fabric texture. A lifestyle image can show how several products work together in a program. Use actual product photography so the creative accurately represents what you sell.
Keep an editable master file as well as final exports. Use clear filenames, such as welcome-kit_newsletter_v2_approved.png, to help everyone identify the correct version.
4. Adapt Your Message to the Placement
Each placement offers buyers varying amounts of space and context. Design for that moment rather than simply resizing a finished image.
Use this guide when planning your creative:
Search or dashboard banner
Emphasize: One product or collection and a concise reason to explore it
Prepare: A simple image, short headline, recognizable logo, and focused destination
Newsletter feature
Emphasize: A timely selling idea or product introduction
Prepare: Artwork plus supporting copy and a CTA suited to the newsletter
Dedicated email
Emphasize: A focused story with enough detail to help buyers act
Prepare: Subject line, opening message, product imagery, and a primary CTA
Curated product content
Emphasize: How the item fits a customer program
Prepare: Product photography, item details, a useful description, and a direct link
In-app feature
Emphasize: Why the message matters to the person working in that tool
Prepare: Brief, relevant copy and a clear action
Social creative
Emphasize: A product detail, demonstration, or use case worth a closer look
Prepare: Artwork or video framed for the placement, with a caption and next step
For a decorator audience, explain the decoration options and product details they need to assess the item. For buyers building customer programs, show the occasion or collection your products support.
Confirm the audience for each booked placement. A newsletter, an in-app feature, and a social post may reach different communities, even when they fall under the same brand.
Before exporting, check the required pixel dimensions, file format, copy limits, and deadline. Preview the actual export at its display size, including on mobile where relevant. A file that looks clear on your design canvas may be difficult to read in the placement.
5. Make it Easy to Find
Choose the destination while writing the ad. If you promise a welcome-kit collection, buyers should be able to find it without having to search your entire catalog.
Match the CTA to the next step:
- New product: Use “View Product Details” as your CTA and link to the featured product page.
- Seasonal collection: Use “Explore the Collection” as your CTA and link to the curated collection page.
- Decoration education: Use “Decoration Options” as your CTA and link to a page that explains which decoration options you offer and the requirements for each (e.g., image quality, color limitations, substrate capabilities, etc.).
- Recognition gifts: Use “Browse Recognition Gifts” as your CTA and link to the featured recognition assortment.
Open the link on your phone and desktop. Check that the featured products are easy to locate and that the page provides buyers with useful details, including options, decoration information, and how to inquire or place an order.
For campaigns linking to your own website, coordinate tracking with whoever manages your analytics. Use consistent campaign names and separate links for different placements so you can review where visits came from. Confirm that tracking works before the campaign goes live.
6. Check Your Product Data Before You Launch
Your creative and your catalog should tell the same story. If the ad features a color buyers cannot find, or the destination shows different pricing, they may need to contact your team before they can move forward.
Review the featured products with your catalog or operations team:
- Do item numbers, descriptions, and images match the ad?
- Are the promoted colors and sizes available?
- Are pricing, minimums, and decoration details current?
- Are inventory and timing claims still accurate?
- Have you checked the destination listing as well as the source data?
OneSource connects catalog management and product data distribution with buyer discovery. Keeping that information useful supports the work your advertising starts: helping buyers find products they can evaluate and sell.
Build a product-data check into your approval process, especially when promoting a changing assortment or a time-sensitive offer.
7. Review Results and Plan Your Next Version
Decide what you will review before launching. Reporting varies by placement, so ask which metrics are available and what each one measures.
For an awareness campaign, you might review available impressions or reach. For a traffic campaign, review clicks alongside visits and engagement on your own website. If your goal is inquiries, agree on how your team will record and connect those inquiries to the campaign.
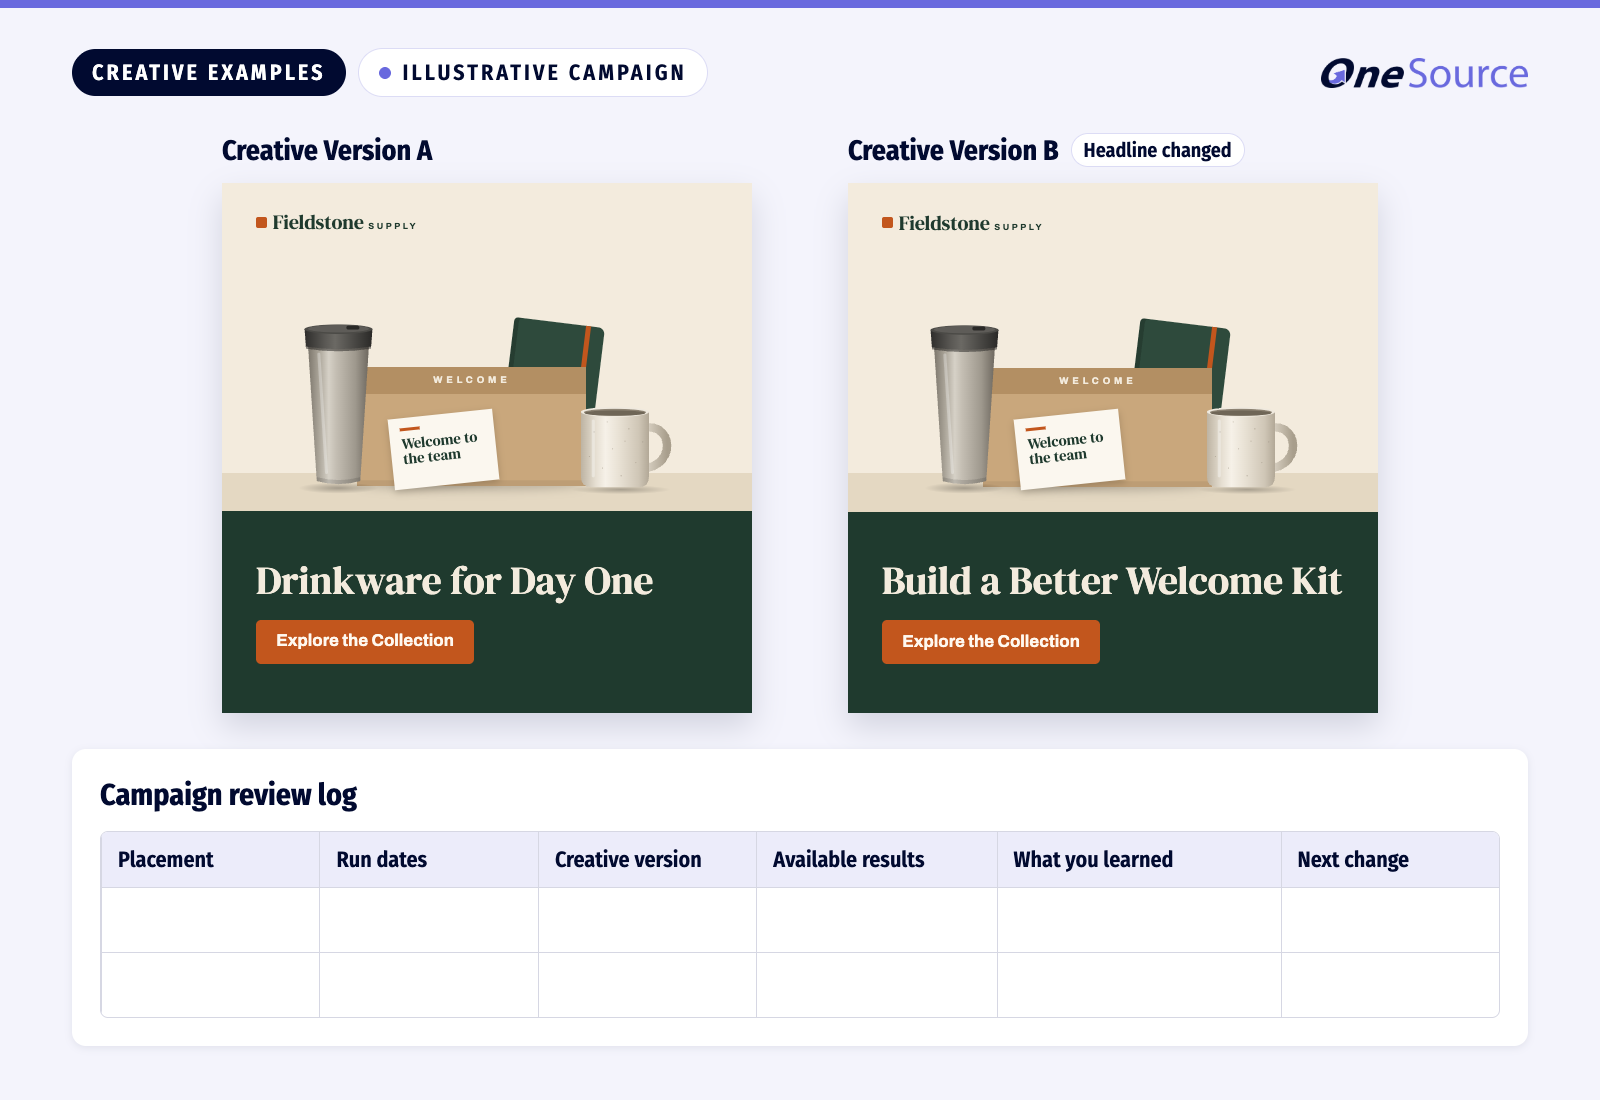
For each placement, record the following details:
- Placement Dates
- Campaign Duration
- Creative Version
- Available Results
- What You Learned
- What to Change for the Next Campaign
Keep comparisons useful. Review results alongside the audience, spend, timing, and placement. Clicks show a response to the creative; they do not establish revenue on their own.
For your next version, choose one change you can learn from. Try a different headline, product image, or CTA while keeping the other elements consistent where possible. If the audiences or placements differ, account for that before crediting the creative with the result.
Your Prelaunch Creative Checklist
Before submitting your campaign, confirm:
- The audience, goal, and featured products are agreed upon.
- The message gives buyers a clear reason to consider the products.
- Claims, inventory, pricing, and timing have been verified.
- Product images and supplier branding are accurate and approved.
- Each asset meets its placement specifications and copy limits.
- The final export is readable at its display size.
- The CTA leads directly to the promised product or collection.
- Links work, and website tracking has been checked where used.
- Reporting expectations and the review date are set.
- The final approver has signed off, and assets are ready by the deadline.
Save the brief, approved creative, and review log together. When the next campaign comes around, your team will have a useful starting point.
Put Your Toolkit to Work With OneSource
Choose one collection you want more buyers to consider. Complete the brief, gather your assets, and build the first creative version around a clear customer use case.
OneSource helps suppliers coordinate product data, buyer discovery, and advertising across relevant industry channels. Your OneSource representative can help match your campaign to an audience and placement, confirm production requirements, and explain the reporting available.
Ready to plan your next campaign? Explore supplier advertising opportunities or contact your OneSource representative.